

Installing a window safety net is not simply a matter of attaching a net to a window frame. The final result depends on accurate measurements, the placement of fixing points, the condition of the surface, and how the net is tensioned and secured.
This is especially important when the goal is to help reduce the risk of children or pets falling from windows or balconies.
In this guide, we will cover the main steps involved in installing a window safety net, the tools that may be needed, when DIY installation can be suitable, and when it may be better to use a professional installation service.

Before starting the installation, inspect the window or balcony and determine the appropriate locations for the fixing points.
Start by measuring the area where the net will be installed, taking into account the window frame, how the window opens and closes, and any surrounding components that could affect the installation.
You should also consider the type and condition of the surface, because the appropriate fixing method can vary depending on the material around the window.
Accurate measurements and proper planning of the fixing points make the installation easier and help achieve a more consistent result.
The tools required can vary depending on the location and installation method. However, DIY installation may require basic tools such as:
For Gridz products designed for DIY installation, the required fixing components are supplied according to the specific product.
If you are unsure which tools are appropriate or how to use them, it is better to confirm the correct installation method for the product and location before starting.

The first step is to accurately measure the window or balcony.
Then determine the fixing points so they are distributed appropriately around the area that the net will cover.
Make sure the fixing points do not interfere with opening or closing the window or with any other components around the frame.
Once the fixing points have been marked, install the components that will support the net.
At this stage, each fixing point should be properly secured to a suitable surface, because the quality of the fixing system is an important part of the overall installation.
Do not judge a fixing point only by how it looks. The important consideration is whether the fixing method is suitable for the actual surface.
After preparing the fixing points, install the net and secure it gradually.
The tension should be distributed evenly so that there are no clearly loose sections or excessive pressure on individual fixing points.
The goal is not simply to make the net tight, but to achieve a consistent and secure installation that suits the size and shape of the window or balcony.
After finishing the installation, check all fixing points and inspect the entire net.
Make sure the window can still open and close normally and that the installation does not interfere with everyday use of the space.
It is also a good practice to check the fixing points and the net after a period of use to make sure the installation remains in good condition.
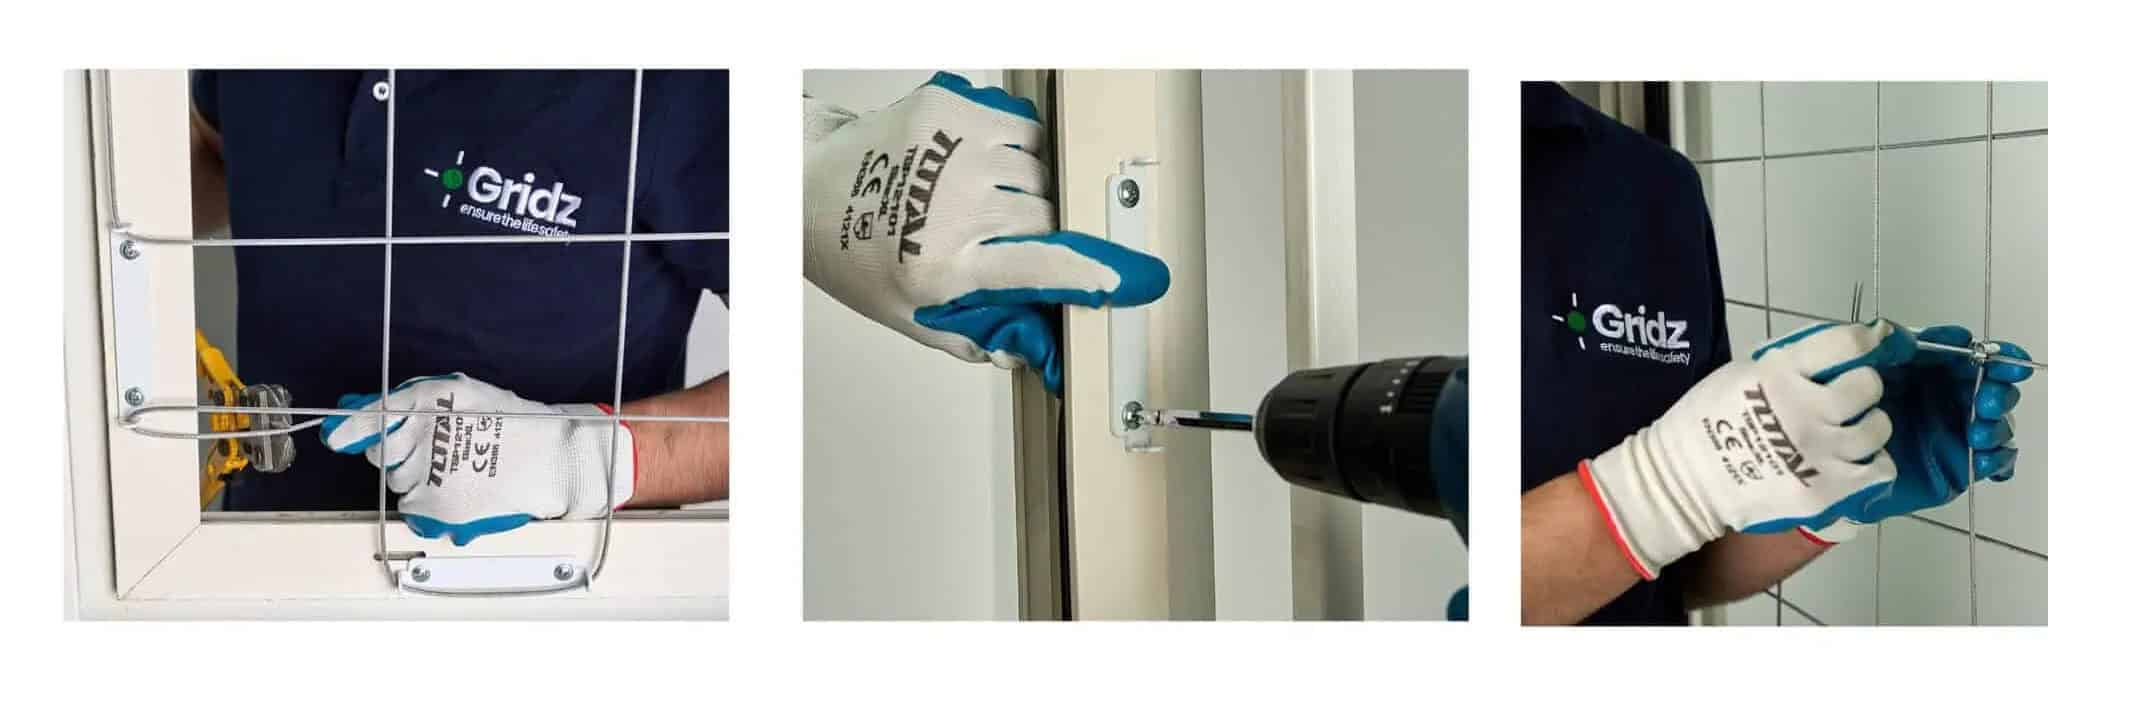
Yes. Some Gridz solutions can be installed by the customer when the appropriate tools and ability to carry out the installation correctly are available.
DIY installation may be suitable when the window is easy to access, the measurements are clear, and you have the basic tools and skills required for the work.
However, if the window is large, difficult to access, located at height, or you are unsure about the appropriate fixing method, professional installation may be the better option.
The goal is not simply to complete the installation, but to make sure the system is installed appropriately for the location and intended use.
Professional installation may be a better choice when the location needs to be assessed before installation, when access to the fixing points is difficult, or when a large number of windows need to be installed.
Professional installation can also be useful for projects or multiple units, where consistent measurements, fixing points, and installation methods can make the overall work easier to manage.
Gridz provides an installation service for customers who prefer professional assistance instead of installing the product themselves.
The installation should be planned so that it does not interfere with the normal use of the window.
The window should remain usable, with enough consideration given to the surrounding space and other components such as mosquito screens.
Gridz solutions are designed with practical everyday use in mind, but the final installation method depends on the design of the window and the characteristics of the location.
Gridz safety nets have been tested to withstand loads of up to 250 kg, reflecting the strength of the net and its fixing system when the product is used and installed correctly.
However, load capacity does not depend on the net alone. It is also affected by the installation method, the surface, and the fixing points used at the location.
For this reason, the tested load figure should not be considered a substitute for proper installation and assessment of the installation conditions.
Several mistakes can affect the quality of an installation. Common examples include:
A good installation starts with accurate measurement and planning before the actual fixing begins.
Yes. A Gridz system can be removed after installation when necessary.
If you want to move it to another location, the condition of the fixing components and the characteristics of the new location should be assessed first to determine whether the system can be reinstalled appropriately.
This can be useful in situations such as moving to another home or changing the layout of a space, provided that the components and the new fixing conditions are suitable.
Window safety net installation is not limited to individual homes.
Protection solutions can be used in homes, balconies, some multi-unit buildings, and projects that require a larger number of installations.
For these projects, the process usually starts by identifying the number of units, measurements, and window types, followed by selecting the appropriate solution and installation method.
If you have a project or multiple units and need help determining the right solution, the Gridz team can help assess the project requirements and the appropriate next step.
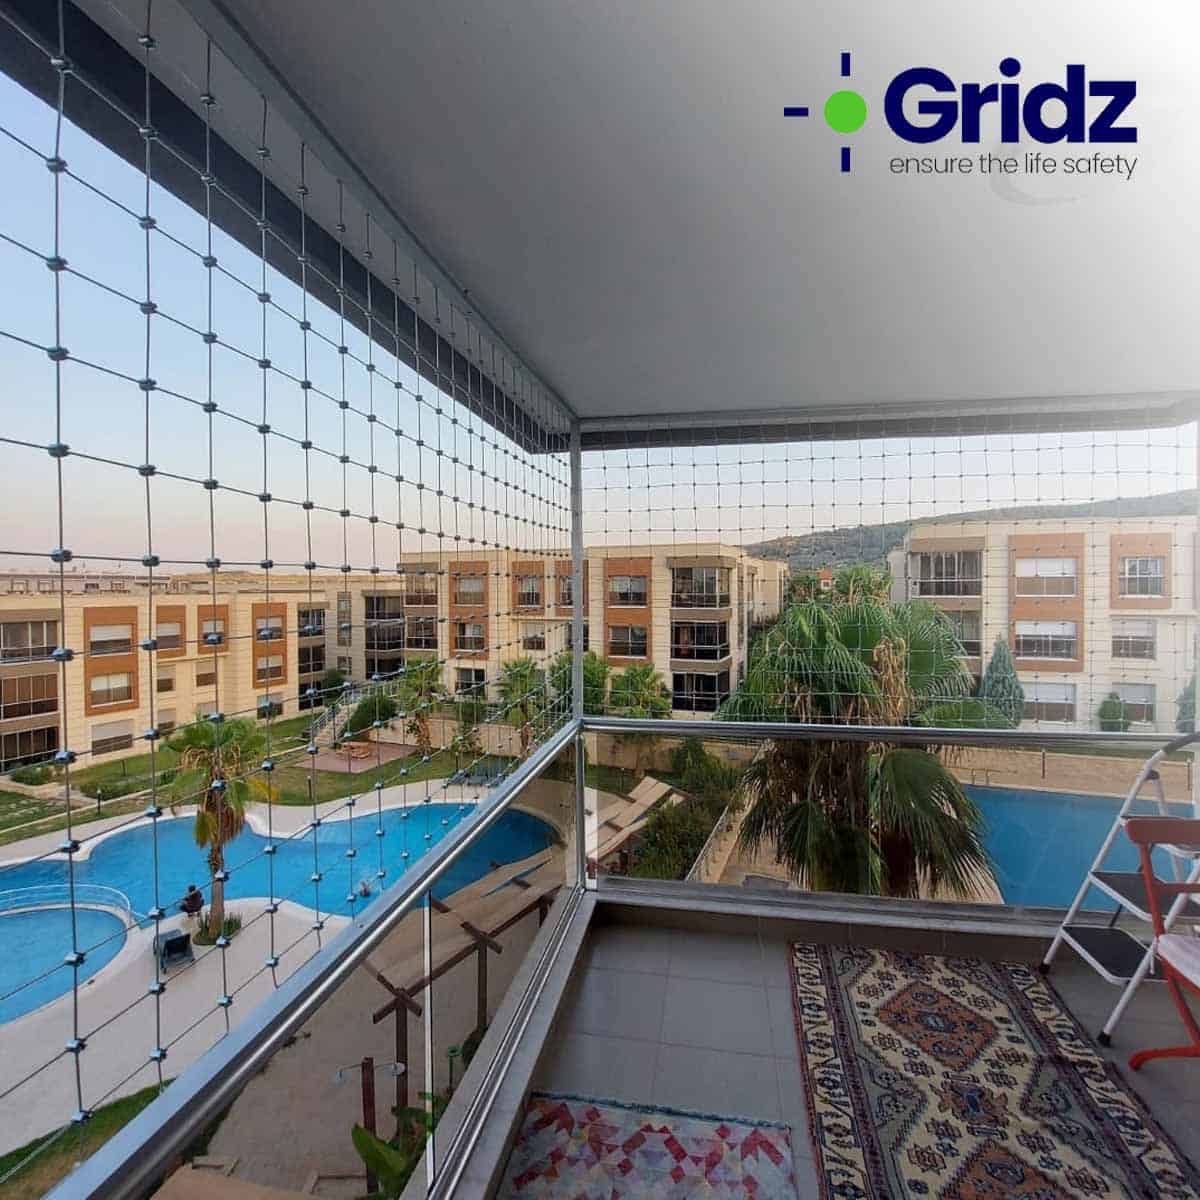
Window safety net installation starts before the actual fixing begins.
Accurate measurements, suitable fixing points, the right tools, and proper tensioning and securing all contribute to the final result.
If you have the appropriate tools and ability and the installation area is easy to access, DIY installation may be a practical option. For difficult locations, larger projects, or situations where professional installation experience is needed, a specialized installation service may be more suitable.
Whatever installation method you choose, the goal should be to use a solution that fits the characteristics of the window or balcony and remains practical for everyday use.


